This is an intermediate tutorial so some steps can be tricky – if you’re having difficulty with it, I suggest you go to the basic section of PSD Vault and practice those tutorials first, then come back and do this one.
Here is a preview of the final effect I have for this tutorial: (Click to Enlarge)

Step 1
Create a new document sized 1280px * 800px with black background, create a new layer and render some cloud on it: (set layer opacity to 10-15%). Duplicate this cloud layer once and compress it down – this way we can create a standing ground for the model:
Use the crack brush you downloaded, erase some parts of the background cloud to add some crack patterns:

Use the crack brush as eraser to add some cracks on the ground too:

Step 2
Load the model image into Photoshop, cut out the model and paste onto our document:
Use a combination of the crack and soft brush eraser tool, add the following layer mask to the model:

Let’s do some basic retouch and add the following adjustment layers to the model as clipping masks:
Black and white

Mask on the black and white adjustment layer:

Levels (It’s very important to set the levels correctly for this image, as it helps to darken certain areas of the body)

Mask on Levels adjustment layer

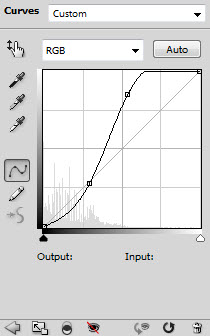
Curves

Mask on Curves adjustment layer:

and here is the effect so far:

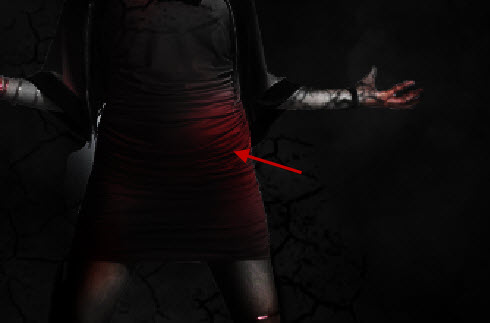
As you can see, because the layer mask added to the black and white adjustment layer, we reveal a number of areas with red colour – we will attach the fire texture to those area later:


Step 3
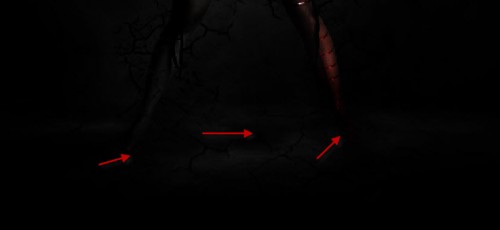
Use a soft black brush to paint shadow under the feet:
Load the fire image into Photoshop, use the Lasso Tool (30px feather) to select a portion:

Copy and paste the selection onto our canvas, use the liquify filter to warp the fire texture and make it soft:

Your result should look similar to below:

Duplicate this fire texture layer a few time, resize the duplicated layers to create a flowing pattern as shown below:

Step 4
I decide to add some texture on the girl’s left leg. So go back to the fire image and select the following portion with a 30px feather Lasso Tool:
Copy and paste the selection to our image, resize and rotate to fit the left leg:

Apply the following black and white adjustment to it:

Change the layer blending mode to “overlay” and you will have the following effect:
Step 5
We can create some flying rock around the model to make it look even more surreal. Go back to fire stock image, this time we use the Lasso Tool (30px feather) to select this portion below:
After the b/w adjustment, use a soft erase to remove the edge, until it forms a rock shape:

Duplicate and merge those rock layers, apply the following Radial Blur to the merged layer:

Move this blurred layer below the rock layer, reduce its layer opacity to around 50%, and here is the effect so far:

Step 6
Lastly we can add some vexel hair to the model. Because we’re making a surreal image, I think it would be good to have some sort of epic hair style, rather than the original one.I have two tutorials here on PSD Vault also covers vexel hair – with different model and surround environment. If you would like to take a look, you can click on the links below:
Create a Surreal Fiery Burnt Wood Lady Figure with Vexel Hair in Photoshop
Create Awesome Grungy Style Artwork with Vexel Hair in Photoshop
If you have tried my previous tutorials on this topic, you will know we always start with picking a darker hair colour from the model:

Create a work path following the shape of this model’s head with Pen Tool:

Stroke this path with the brush settings below: (we want a 2px hard brush)

Stroke the path a few times, each on a different layer:

Once you’re done with the dark hair strokes, pick a light hair colour from the model:

Stroke the work path with the light colour brush repeatly, mix it in with the darker ones. You will have some nice layered hair effect:

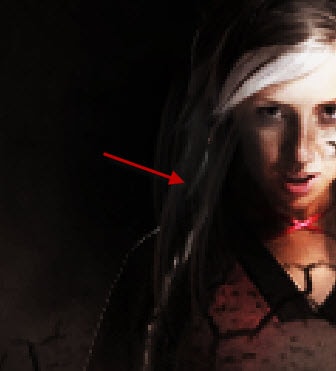
Repeat the above steps on the right side and create some vexel hair there too:

and here is the effect so far:

I then added a few colours via a colour balance adjustment layer, and here is the final effect I have for this tut: (click to enlarge)

Hope you enjoy this tutorial and find it useful! Till next time, have a great day!


0 komentar:
Posting Komentar